Thursday, April 7, 2016

He said the tree has to go.

I didn't want to loose another pine tree, but I could see the sense in it.

So in the afternoon we proceeded with it.

I took video.

He lays it down exactly where he intends on putting it.  Between two other pines.


And now we had a big mess.  Branches all over the place.  We started to clean it up. We tossed the pieces we cut up to fit the bucket on the skid steer and Rich hauled it away to a brush pile out back.

The tree was truly too close to the house and if we'd had a bad windstorm he was afraid it would to damage to the roof as it was heavy with branches over the top of the house.

However I did enjoy having coffee in the morning and watching the silly squirrels and birds scamper up and down this tree for the past 20 years.


It looks rather bare right now but I imagine with a new porch near where hubby is standing will fill in some space.
We briefly talked about some shrubs or low lying plants to plant near the house.

His mind wasn't on it.  He was exhausted after that and went to lay down for a bit.
My neighbor came down because he'd heard the chain saw going.

Within minutes he pitched in and helped me stack up the rest of the branches so they could easily be hauled away.
New neighbor!  Talk about being blessed and lucky.

It only took us an hour this morning to clean this up.  The tree trunk is still there.  We will drag it away and hopefully sell it as a nice pine log.

And then Morris and I worked today on cleaning up the small stuff and replanting the hostas that had been at the base of the pine.
They would need a new home and I had just the place for them.

My helper.


This afternoon a couple of trucks pulled into the driveway.  It was our Contractor Kurt and his concrete/digging guys.
They came to look at where they were going to put the basement.

Kurt said he was looking at sometime next week to start digging.
We had a conversation about not having water as they will have to cut the lines and re-attach them.
We also had a conversation about not having electricity.  Hmmm.  

Where they have to dig, the electric and water must be cut off for obvious reasons.

I'm guessing we'll have an interesting time.
Hopefully we won't be without for more than 24 hrs as I will need to find places for my freezer and refrigerated food.  Also we will need to fill stock tanks and add more water to some of our old stock tanks.

It will be an exercise won't it?  So the tree went, the contractors are itching to start and things are looking good in the long range forecast.

Sounds like I best get busy and pack up the rest of the 'stuff' that will need to be moved inside the house.
Yikes, it is almost here!

Tuesday, April 5, 2016

Picking floor, cabinets, countertops, and doors!

I want to give Artie of Johnson's One Stop for doing such hard work yesterday.  His ideas were helpful and he kept us from making a mess of things.

We are going to go with the Light Hickory Cabinets with a rather simple front.
Here is a sample of what it will look like. Mind you this is not our kitchen design itself.

The flooring will be a lighter color as the countertops will be a dark color.  I went with a greyish colored wood laminate floor.

It will cover the mudroom floor, the kitchen and eating area.

There is enough warmth in it to pick up on the hickory and the designs in the counter top.

I posted this photo before. 
The bathroom will have a stone look to it. The shower and toilet will be white and I may even pick white for the vanity.

Again there is enough texture to make it interesting yet it will work with the colors I pick for accents.

However, the bedroom floor is my win-win. I saw it, I liked it and I always wanted something fun and interesting.  

Rustic!  Looks like a barn floor!

I think the flooring will make me a happy person.
Here is a sample of the old worn out kitchen floor.  
We have peeled all loose stick 'em tiles and in my opinion it was always ugly ugly. But we knew we'd eventually change it.

I'll see if I can find the doors that we'll be putting on the house. Rich had decided green, I wanted barn red.
Guess who won?

I like barn red, I like red. The gables on the house will have barn red shakers.  Isn't that cool?
I hope so.

I'll be living here a long time I hope!

Thursday, March 31, 2016

Closer!

The date for remodel is getting closer!  It looks like there may be a start date of ... about April 15th.

We spoke to Kurt yesterday and that is when the road bans are due to come off.  Road bans are put on to prevent heavy vehicles from traveling on county and township roads that do not have the same good road base as the highways.
As the frost comes out of the ground, the road bases can be soft and heavy loads will damage the roads.

We've pretty much finished deciding on what the siding colors will be as well as the roof.  We only need to go in and finalize that.

Now I begin in earnest to clean out the back entry way so that when the construction does begin I won't be in a rush to toss everything into boxes 'willy nilly' and hope to be able to find things after the remodel.

Here is a photo of the house that I'd done for artistic value.  I wanted it to look beautiful.  Photographed last summer in Infrared.

This is the south facing part of the house.  When finished, it will have a porch extending 9 feet from the house as it is pictured here.


This is a photo of the roof of the south facing part of the house. Pretty sad right?  We intended to get things taken care of long before the shingles got in this shape.  The hole in the roof that is covered, is where the chimney used to be.  We never had a wood burning stove in the house and the chimney was never in use.  It had to come off before the remodel.


South west facing corner of the house. I dug out all of the flowers and plantings around the house last fall so that the guys working on the house wouldn't be stepping on them.  I relocated what I could and hopefully some of the plantings will survive to be moved back.


This is the north side of the house.  As you can see, this is a Tiny House.  We call it a cottage.
There will be a basement and an addition put on this side.  It will extend the house 10 ft out from where it is now.
The new space will give us a slighty larger bathroom, a mudroom, a real kitchen and a downstairs bedroom.


And here is the view from the the bottom of the driveway.  The driveway extends quite a ways up towards the ridge top.

The look and feel of the place will change for the better we think!

Wednesday, March 16, 2016

Picking out colors

My remodeled house may be a spectacle or it may be cute. Hubby and I went to pick out our siding and roofing colors.  Of course we didn't agree on the color of the siding.

So we will compromise.  The majority of the house will have a wheatish-tannish kind of color.
The gables will have barn red shakes or 'fish scales'.

Our roof will be Forest Green.

Windows and trim will be white.

The porch entrance door will match the green roof.
The north side entrance door will match the barn red gables colors.

From what I am reading about proper colors and designs, I need to go for more boring stuff.  Like muted matching greenish stuff or more retirement tan colors.  
Hold on a moment while I go gag.

How about a nice grey tone with white windows and trim?
Nah.

I wonder if people will come down my driveway and see my house and pause.  I don't mind making a statement.  I've decided that the colors fit the personalities of those living inside.

We used the other day to look at countertop colors for the kitchen.  I found some colors that I think will work with black appliances and Hickory cabinets.

This is nabbed from the internet and looks interesting.


The kitchen won't be set up this way, but this is the colors of Hickory matched with the colors of the counter-top I'd like to have.

However the flooring is pretty close to what we thought we'd like and...and... the cabinet on the side of the fridge was something we also talked about.  I love the idea of having a place to put my broom and cleaning stuff!

I've been thinking about the bathroom.  Fixtures [toilet and tub] will be white. But I want some bluish tealish sort of muted colors in it somewhere.  I think I can design a shower curtain to those colors.  

My house would be a rainbow of colors if I could manage it.  I've lived with icky dark brown for too long.

The only brown left will be in wood, natural wood and not this horrid dark paneling we've lived with for so long.  I want light and bright.

Sunday, February 14, 2016

Eating Area and Wallpaper...ugh!

Today we started on the 'eating' area of our little house. I took a break from removing wall paper as I'd gotten to Rich's corner and stared at his stuff.

What on earth would we do with all of that stuff?

It is piled in broken down boxes and no matter how I tried over the years, I could never get him to totally clean up and put away the Stuff.

Of course we live in a Tiny House and when stuff accumulates, it needs to be weeded out and put somewhere.  However, this tiny house has no extra storage.  
For the remodeling, I started last year packing away any extra Stuff that I could.  
I stored it in a shed in plastic tubs.

Yesterday I handed Rich a large plastic tub and let him go at it.
He cleared just enough Stuff so that I could move the table and get at the wall.


You are looking at an area where the flooring will be replaced, ... we are pulling up the old tiling as we go along.  The brown wood will we replaced with a very light colored almost blonde wood.
The windows of course will be replaced and ... AND! No wallpaper!
I'm considering colors for the walls now.

The Stuff will reside somewhere else and I am thinking of getting a corner cabinet of some sort for Rich to put all of the paperwork Stuff that he keeps [and rarely looks at] into and out of sight.


We are doing a wood laminate floor and there will be so much more storage once the remodel is done.

So there it is.  Ugly as all get out right now, but perhaps cute as a button once it is finished.

The cabinets will be hickory and I would like a very very light light green for the walls.

When I was a kid we rented a house that had a putrid green paint on the kitchen walls and white cabinets.  I recall washing those walls and wishing the paint would fall off.  It never did.

So why would I even consider it again?  I think I can find a nice light green/grey color.  I don't think I want white in the kitchen section.

Maybe off white in the eating section?  That sure would brighten things up!

Well off to peel more wall paper and sort through more stuff.

Friday, January 22, 2016

Oh Yuck Wall paper ~

Wall paper on drywall that was not primed is a royal pain in the ... -ss to remove.
I however did find a secret weapon that helped.

I watched YouTube Videos on 'How to Remove Wall Paper' and it all looked easy.

Just wipe with hot water, spray with hot water, use Dawn, and it will just peel right off and then you wash with hot water and vinegar --- or Dawn Dishsoap and get the glue off.

Easy Peasy.


Wrong.  All the walls shown had been primed.


Suggestions for taking wall paper off from un-primed walls?


Take down the drywall and start over.


Wow, that was not helpful and not what I wanted to hear. Another person wrote, get a steamer and it goes really well. The trick is hot water.


I started thinking about the Dawn Dishsoap and how it breaks down the water surface tension and allows the water to soak into the material.


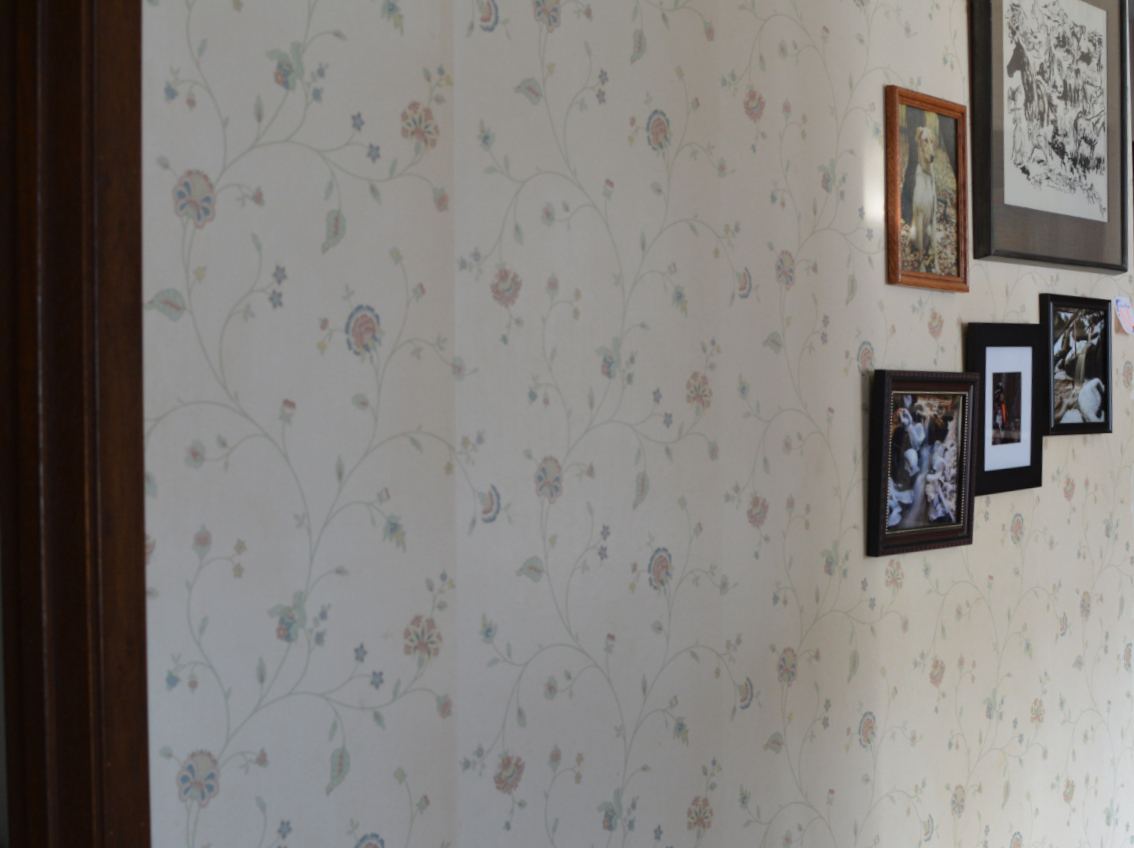
This paper was nasty grungy.  After taking down the wall of photos I was grossed out completely.


Yuck.


Above the small closet door that is under the stairs:


Super yuck.  Why hadn't I seen it?  
In truth, I wanted to get rid of the wall paper years ago, but Rich didn't want to start a project like that.
So I began to ignore the ugly stuff.  I thought...one day I will get the chance to remove it!

And ... now I do.


Morris is on the stairs supervising the stripping.

And it doesn't come off very easily.


So I decided to take some Oxyclean and dab it onto a cloth, then wipe the surface of the wall paper and spray it with warm water.


Well not only did it help the water absorb into the wall paper, but it took some of the grunge out too.  Of course I sprayed up towards the ceiling and then wiped with the Oxyclean cloth and found that my ceiling was going to need a very good cleaning also.  


Insert a large groan ... however I am prepared for that and I figured it would be coming next.


Meanwhile, back to the paper.  Sometimes it would come off in larger strips and sometimes it wouldn't.


Between chores and errands, this section took all day. I'd be really discouraged if I had larger rooms to do.  But this is such a small house that I only have two partial walls left.


I was extremely surprised at how much cleaner and brighter the wall was after the paper removal.


Considering that it wasn't a primed wall, I didn't do too badly. Some of the dry wall finish came off but hopefully we will be able to repair that fairly easily.


Meanwhile Rich has been working on the bricks that had been put in the living room when Glen owned the house and had a wood burning stove on it.


Before the work started

All of the brick will be removed


After one day of removal.


This is a dusty and very noisy project so hubby has been doing it a bit at a time.
He will also be removing the very very dark paneling and replacing it with light colored 'car siding'.  He wants to retain the 'cabin' look with wood and I wanted bright and light walls.

This will be our compromise.

So onward.
Morris?
He is getting accustom to the work now.  He still dislikes the shop vac but it doesn't freak him out anymore.

I might take a day or two off from the wall paper peeling.  I'd like to do some hiking now that the outdoor temps have risen above the zero mark.


Friday, January 15, 2016

Wallpaper Removal

With the cold wicked outside weather and temps in the minus 0's, I thought I'd make an attempt at seeing just how hard removing the wallpaper would be.

I decided to try it on a wall that will be removed during the remodel.
First, I did some research on the how to aspect of removing wallpaper yourself.
The videos looked embarrassingly easy. Just hot water/Dawn mix or Vinegar/hot water...or use chemicals from Home Depot, Lowes, or some other store.

I decided not to use the chemicals.  I wouldn't be able to air out the house during the frigid weather.

So I picked a day to begin.  I quickly found that the walls were not primed underneath.  The wallpaper would not come off in beautiful long strips.
It was going to be a painful long ordeal.

First a shot of the wall.  Remember it will be removed during modeling so this was a good place to start.

And so I began.  The length of time that I worked on this actually was about and hour and a half.

But the process was slow until I began to figure out the best way for the removal. Below is a shot of the wall, and yes most of the floor tile has been removed also.


Short video:


Day two I started on the living room wall and around the doorway to the bathroom.


The small electric heater next to the bathroom was also removed.


The door frame to the bathroom had to be removed also.  In some places the wallpaper was under trim and in others it isn't.


Anyone looking at this interior and the wallpaper would agree, this little house really needs a face lift inside and outside.


This is where I stopped last night.  It looks like a mess and it looks like it was impossible work.

This section is coming off a little bit easier perhaps because I am learning to do it better as I go along.  I'm not in a mad rush and so the mess is minimal.

Crooked Creek Construction, LLC, will be doing the addition and the exterior work.  This portion of the remodel is going to be our job.

I'm actually looking forward to NOT looking at that awful wallpaper anymore!